Ever popped your hood and been greeted by a dusty, grimy engine bay? It's not exactly the glamorous side of car ownership, is it? That neglected space under the hood, often overlooked, can be transformed from a greasy mess into a point of pride with the right approach.
Let's face it, many car enthusiasts hesitate to clean their engine bays. The fear of damaging sensitive components, the sheer amount of built-up grime, and the daunting task of figuring out where to even begin can be enough to put anyone off. It feels like a risky endeavor, one where a simple mistake could lead to expensive repairs. And who wants to spend their weekend wrestling with a greasy, complicated puzzle?
This guide is designed to demystify the process of cleaning your engine bay, providing you with the knowledge and confidence to achieve professional-looking results without the professional price tag. We'll walk you through the necessary tools, safe cleaning techniques, and essential precautions to keep your engine running smoothly and looking its best.
In this article, we'll cover everything you need to know about cleaning your engine bay like a pro. We'll discuss the importance of proper preparation, the right cleaning products, and the step-by-step process for safely removing dirt, grease, and grime. We'll also delve into some common myths and misconceptions about engine bay cleaning, providing you with the facts you need to make informed decisions. By the end, you'll be equipped with the knowledge and skills to transform your engine bay from a neglected eyesore into a gleaming testament to your car care dedication. We'll be covering topics such as degreasing, protecting electrical components, and achieving that showroom shine. So buckle up, and let's get started!
Safety First: Protecting Your Car and Yourself
I remember the first time I tried cleaning my engine bay. I was armed with a garden hose, a bucket of soapy water, and a whole lot of enthusiasm. Needless to say, it didn't go as planned. I ended up with a sputtering engine and a sinking feeling that I had done something terribly wrong. Luckily, no permanent damage was done, but it was a valuable lesson learned about the importance of preparation and safety. Now, the first and most important aspect of engine bay cleaning is safety. Before you even think about grabbing the cleaner, disconnect the negative terminal of your car battery. This prevents any accidental electrical shorts while you're working. Next, identify and protect any sensitive electrical components, such as the distributor, alternator, and any exposed wiring. You can use plastic bags, aluminum foil, or even electrical tape to shield these areas from water and cleaning solutions. Wear gloves to protect your hands from harsh chemicals and eye protection to prevent splashes. Finally, never clean a hot engine. Allow it to cool completely before you begin, as hot surfaces can cause cleaning solutions to evaporate too quickly or even ignite. Remember, a clean engine bay is great, but a safe cleaning process is even better. Failing to protect these areas can lead to costly repairs, so take the time to do it right.
Choosing the Right Cleaning Products
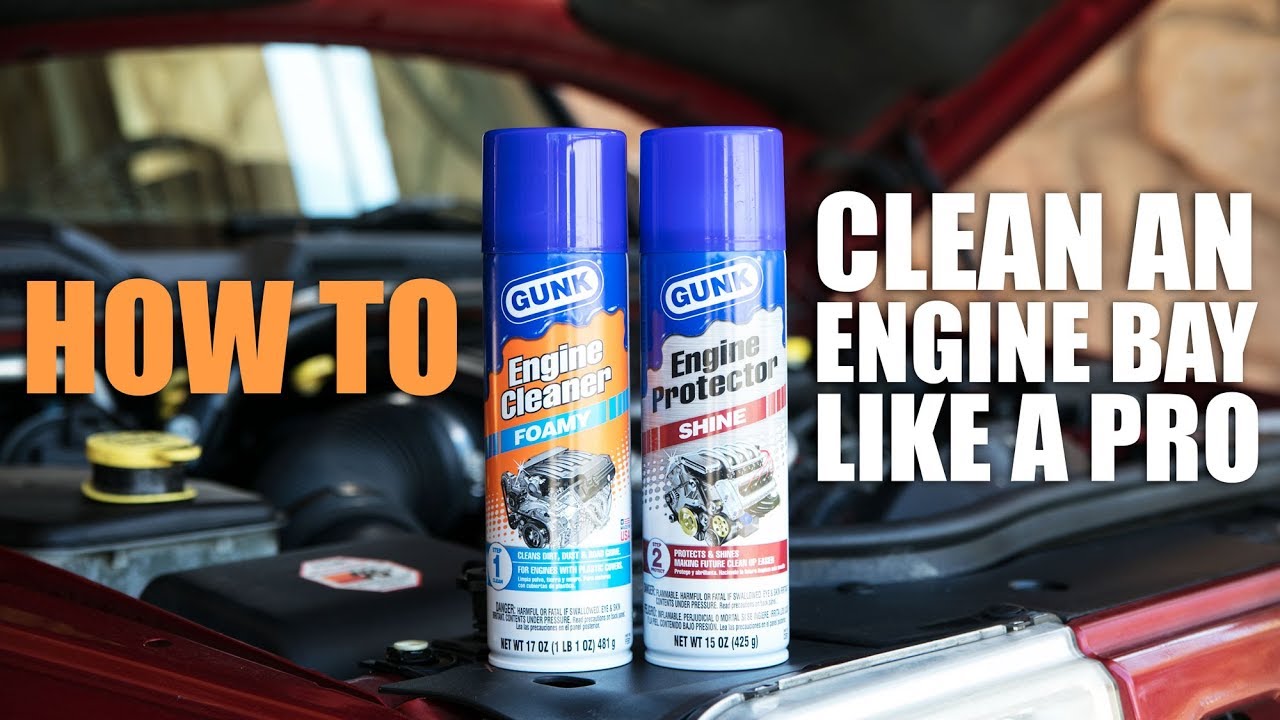
Selecting the correct cleaning products is paramount for achieving a pristine engine bay without causing damage. Not all cleaners are created equal, and using the wrong one can lead to corrosion, discoloration, or even damage to plastic and rubber components. Start with a dedicated engine degreaser. These are specially formulated to break down stubborn grease and oil without harming your engine's delicate parts. Look for a degreaser that is safe for use on rubber and plastic. For general cleaning, a mild all-purpose cleaner diluted with water is a great option. Avoid using harsh chemicals like bleach or abrasive cleaners, as these can damage paint and other surfaces. Finally, consider using a protectant after cleaning to help repel dirt and water, keeping your engine bay cleaner for longer. A good protectant will also help to prevent corrosion and keep rubber and plastic components looking their best. Remember to always read and follow the manufacturer's instructions for any cleaning product you use. Applying too much cleaner or leaving it on for too long can cause damage.
The History and Myths of Engine Bay Cleaning
The concept of engine bay cleaning isn't new. Back in the early days of motoring, a clean engine bay was a sign of meticulous maintenance and pride in ownership. However, the methods used were often crude, involving harsh solvents and vigorous scrubbing. Over time, as engines became more complex and electronic components more prevalent, the need for safer and more specialized cleaning techniques became apparent. One common myth is that cleaning your engine bay will inevitably damage something. While it's true that carelessness can lead to problems, with proper precautions and the right techniques, engine bay cleaning is a safe and effective way to maintain your vehicle. Another myth is that a dirty engine bay doesn't matter. In reality, a buildup of dirt and grime can insulate the engine, leading to overheating. It can also corrode electrical connections and make it difficult to spot leaks. A clean engine bay allows for better heat dissipation, easier maintenance, and a more professional appearance. So, don't let the myths deter you. With the right knowledge and tools, you can confidently clean your engine bay and reap the benefits.
Unlocking the Hidden Secrets to a Spotless Engine Bay
The secret to a truly spotless engine bay lies in the details. It's not just about blasting away the grime; it's about paying attention to the nooks and crannies that often get overlooked. Use a small brush, like a toothbrush or detailing brush, to reach tight spaces and scrub away stubborn dirt. Pay close attention to areas around hoses, wiring harnesses, and connectors. Another secret is to use a low-pressure water source. A garden hose with a gentle spray nozzle is ideal. Avoid using a pressure washer, as it can force water into sensitive components and cause damage. After cleaning, take the time to thoroughly dry the engine bay with a clean microfiber towel or compressed air. This will prevent water spots and help to prevent corrosion. Finally, don't forget to dress your engine bay with a protectant. This will give it a showroom shine and help to repel dirt and water in the future. These seemingly small details can make a big difference in the overall appearance of your engine bay.
Product Recommendations: My Go-To Cleaning Arsenal
Over the years, I've tried countless cleaning products in my quest for the perfect engine bay shine. Based on my experience, here are a few of my go-to recommendations: For degreasing, I swear by Simple Green Extreme Simple Finish. It's effective at cutting through grease and grime, yet safe for use on most surfaces. For general cleaning, I like Meguiar's All Purpose Cleaner. It's a versatile cleaner that can be diluted to suit various cleaning needs. For protecting and dressing, I recommend 303 Aerospace Protectant. It provides excellent UV protection and leaves a non-greasy, satin finish. In addition to these products, you'll also need a few essential tools, such as a garden hose with a spray nozzle, a bucket, various brushes, microfiber towels, and gloves. Remember, the right products and tools can make all the difference in the outcome of your engine bay cleaning project. Don't be afraid to experiment and find what works best for you and your vehicle.
Step-by-Step Guide to Engine Bay Cleaning
Let's break down the engine bay cleaning process into manageable steps. First, gather your supplies: degreaser, all-purpose cleaner, brushes, microfiber towels, gloves, eye protection, plastic bags, and a garden hose. Disconnect the negative battery terminal and protect sensitive electrical components. Next, spray the engine bay with degreaser, focusing on areas with heavy grease and grime. Allow the degreaser to dwell for the recommended time, then scrub with your brushes. Rinse the engine bay with a gentle spray of water, being careful not to directly spray sensitive components. Next, apply all-purpose cleaner to the entire engine bay and scrub with your brushes. Rinse thoroughly with water. Dry the engine bay with microfiber towels or compressed air. Finally, apply a protectant to all surfaces to give it a showroom shine. Remember to work in sections and take your time. Rushing the process can lead to mistakes and potential damage. By following these steps, you can achieve professional-looking results without the professional price tag.
Essential Tips for a Sparkling Clean Engine Bay
Here are a few essential tips to help you achieve a sparkling clean engine bay: Always start with a cool engine. Cleaning a hot engine can cause cleaning solutions to evaporate too quickly and potentially damage surfaces. Use a low-pressure water source. A pressure washer can force water into sensitive components and cause damage. Protect sensitive electrical components. Cover them with plastic bags or aluminum foil to prevent water from entering. Use a variety of brushes. Different brushes are needed to reach different areas and scrub away stubborn dirt. Dry the engine bay thoroughly. This will prevent water spots and help to prevent corrosion. Apply a protectant after cleaning. This will give it a showroom shine and help to repel dirt and water in the future. Don't be afraid to experiment with different products and techniques to find what works best for you. And most importantly, take your time and be patient. A clean engine bay is a testament to your car care dedication, so enjoy the process.
Dealing with Stubborn Grease and Grime
Sometimes, no matter how hard you scrub, certain areas of your engine bay seem to resist cleaning. This is often due to stubborn grease and grime that has been baked on over time. In these cases, you may need to use a more aggressive degreaser or a specialized cleaning tool. One effective technique is to use a steam cleaner. The steam helps to loosen the grease and grime, making it easier to wipe away. Another option is to use a plastic scraper to gently remove the stubborn deposits. Be careful not to scratch the paint or other surfaces. For particularly difficult areas, you may need to repeat the cleaning process multiple times. Apply the degreaser, scrub, rinse, and repeat until the area is clean. Remember, patience is key. Don't get discouraged if it takes a few tries to remove the stubborn grime. With the right tools and techniques, you can eventually achieve a spotless engine bay.
Fun Facts About Engine Bay Cleaning
Did you know that a clean engine bay can actually improve your car's performance? A buildup of dirt and grime can insulate the engine, preventing it from dissipating heat effectively. This can lead to overheating and reduced performance. Cleaning your engine bay can also make it easier to spot leaks. A clean engine allows you to quickly identify any oil or fluid leaks, allowing you to address them before they become major problems. Another fun fact is that a clean engine bay can increase your car's resale value. A well-maintained engine bay is a sign of a car that has been cared for, which can make it more appealing to potential buyers. Finally, cleaning your engine bay can be a surprisingly therapeutic activity. It's a chance to get your hands dirty and connect with your car on a deeper level. So, next time you're feeling stressed, grab your cleaning supplies and head to the garage. You might be surprised at how much you enjoy it.
How to Maintain a Clean Engine Bay
Cleaning your engine bay is just the first step. To keep it looking its best, you need to establish a regular maintenance routine. After each wash, take a few minutes to wipe down the engine bay with a damp cloth. This will help to remove any loose dirt or debris before it has a chance to build up. Regularly inspect your engine bay for leaks. If you spot any leaks, address them immediately to prevent further contamination. Apply a protectant to your engine bay every few months. This will help to repel dirt and water and keep it looking its best. Avoid using harsh chemicals or abrasive cleaners, as these can damage surfaces. Finally, consider having your engine bay professionally detailed once a year. A professional detailer has the tools and expertise to thoroughly clean and protect your engine bay, keeping it looking its best for years to come. By following these simple tips, you can maintain a clean and healthy engine bay that you can be proud of.
What If I Damage Something While Cleaning?
The fear of damaging something is a common reason why people avoid cleaning their engine bays. While it's true that mistakes can happen, the risk can be minimized by taking proper precautions and following the advice of experts. If you accidentally get water in a sensitive electrical component, don't panic. Immediately disconnect the battery and allow the component to dry completely. You can use compressed air or a hairdryer to speed up the drying process. If you spill cleaning solution on a painted surface, wipe it off immediately with a clean, damp cloth. Avoid letting the solution dry on the surface, as it can cause damage. If you damage a hose or wiring harness, replace it as soon as possible. Driving with damaged components can lead to more serious problems. If you're unsure about how to repair a damaged component, consult a qualified mechanic. Remember, prevention is always better than cure. Take your time, be careful, and follow the steps outlined in this guide to minimize the risk of damage. A small scratch or ding isn't the end of the world.
Top 5 Engine Bay Cleaning Mistakes to Avoid
To help you avoid common pitfalls, here are the top 5 engine bay cleaning mistakes to avoid: Using a pressure washer. Pressure washers can force water into sensitive components and cause damage. Not protecting electrical components. Water and cleaning solutions can damage electrical components, leading to shorts and malfunctions. Using harsh chemicals or abrasive cleaners. These can damage paint and other surfaces. Cleaning a hot engine. Hot surfaces can cause cleaning solutions to evaporate too quickly or even ignite. Not drying the engine bay thoroughly. Water spots and corrosion can develop if the engine bay is not dried properly. By avoiding these mistakes, you can ensure a safe and effective engine bay cleaning experience.
Question and Answer
Q: Is it safe to use a pressure washer to clean my engine bay?
A: While some people do use pressure washers, it's generally not recommended due to the risk of forcing water into sensitive electrical components. A garden hose with a gentle spray nozzle is a much safer option.
Q: What if I accidentally get water in the distributor?
A: If you get water in the distributor, disconnect the battery and allow the distributor to dry completely before attempting to start the engine. You can use compressed air to speed up the drying process.
Q: How often should I clean my engine bay?
A: How often you clean your engine bay depends on your driving conditions and personal preferences. However, a good rule of thumb is to clean it at least once a year.
Q: What's the best way to protect electrical components during cleaning?
A: The best way to protect electrical components is to cover them with plastic bags, aluminum foil, or electrical tape. This will prevent water and cleaning solutions from entering and causing damage.
Conclusion of How to Clean the Engine Bay Like a Pro
Cleaning your engine bay might seem daunting, but with the right knowledge, tools, and precautions, it can be a rewarding experience. Not only will it improve the appearance of your car, but it can also help to improve its performance and extend its lifespan. By following the steps outlined in this guide, you can confidently clean your engine bay like a pro and enjoy the benefits of a clean, healthy, and well-maintained vehicle. Remember to prioritize safety, choose the right products, and take your time. With a little effort, you can transform your engine bay from a neglected eyesore into a point of pride.